Nature and Wildlife Photography Tips for Beginners
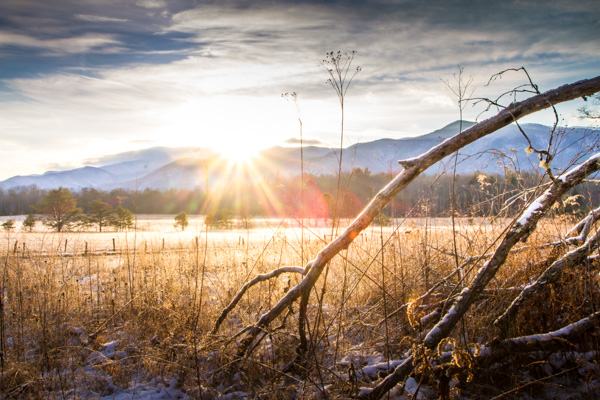
If you have an interest in wildlife or nature photography, then there is a good chance you have seen an image at some point that has completely taken your breath away. Maybe it was a photograph of a sweeping landscape washed in the golden light of the dying afternoon sun, or a close-up of some small natural miracle that you had never noticed before that moment.
You might even have asked yourself, “How did they do that?”


Well, the majority of those incredible photographs came about through a good deal of physical hardship, practiced patience, and a healthy amount of self-made luck.
Here are some tips to help you become stronger at wildlife photography and better at recording of the natural world.
Do your homework before heading out
Be as educated as possible before you ever make a photo. Doing your homework is one of the most important, yet loathed parts of wildlife photography. It never pays to walk into a situation and be completely clueless. Though you can never be totally prepared for every challenge you will face (that’s part of the fun) you can educate yourself so that you safely make the most of your outing.
What gear to pack
Advanced gear is not a requirement. However, patience and perseverance are essential. You don’t need the latest and greatest zoom lens or space-age gadgetry in order to produce outstanding nature and wildlife photos. At the same, you must also understand any limitations of your kit, so that you will have realistic expectations and avoid disappointment.

This photograph was made using the 28-135mm kit lens that came with my camera – after I slowly and quietly crawled into range.
Gear up for what you’ll most likely be shooting. Packing for a photographic outing can cause a lot of anxiety. It’s easy to overpack due to fear of lacking a piece of gear. Overpacking, though, can be even worse than underpacking. You become weighed down and uncomfortable. You find yourself not enjoying what you’re doing which is one of the most preventable of all mistakes, made by photographers. Research the animals and scenes you are likely to encounter. Decide what is most and least important to you. Make choices, commit to them, and then let it go. It will make packing a lot less stressful.
If you plan on photographing wildlife, such as birds and animals that scare easily, then pack your best zoom lens so you can keep distance between you and your subject. Shooting landscapes or scenes where stealth is not a concern? You might consider taking along a wider angle lens to better capture your scene. Ultimately, there is no secret formula and no true all-in-one lens to cover every situation. Be informed before you leave so that you can make the best use of whatever lens you have.
A good bag is worth its weight in gold
All the planning in the world isn’t worth much unless you can comfortably carry your essential tools with you. Find a camera bag that can carry the gear you need easily, and is equally comfortable on your body. Bags range greatly in price and quality but you usually get what you pay for. For added peace of mind, you might consider a bag that is semi-weatherproof or water-resistant.
My go-to lightweight bag for wildlife photography, shown with and without the handy rain cover deployed.


Read reviews and find a bag that fits your body, your gear, and your planned outing. You will have a much more comfortable and enjoyable experience. Speaking of comfort…


Comfort items
Shoes: A good pair of hiking shoes or boots is one of the most important pieces of gear for any wildlife photographer. Grit, dirt, mud, water, insects, rocks, and creepy-crawlies – you need a pair of shoes or boots that can handle all of these elements. Your shoes should be well-fitting and suitable for walking long distances. If your feet become uncomfortable it won’t be long before you start thinking about cutting your trip short.
Prepare a checklist
It’s always a good idea to have a mental checklist before beginning any shoot. Before your outing, ask yourself the following questions:
- Are any special permits or permissions required? Some National or State Parks and wildlife sanctuaries require special permits for access to certain areas, especially those deemed as backcountry environments.
- Where will I park my vehicle? This is very important. Believe me, if you park your vehicle in an unauthorized area you will be stuck with a sizeable fine or worse, return to find your vehicle has been towed.
- Are there time restraints of any kind? Most natural areas and parks have hours of operation just like a business. You might arrive expecting to shoot a great sunrise only to find out the location you chose isn’t accessible until after daybreak. Also remember that wild creatures and critters are usually most active in the early morning or late evening.
- What are the expected weather conditions? This is a biggie. Know what to expect as far as the weather is concerned. Check the forecast the day of departure and keep tabs on it throughout the day if possible. NEVER chance endangering yourself or your equipment by venturing out unprepared for bad weather.
- What are the times for sunrise and sunset? Again, be sure the places you want to capture a sunrise or sunset are accessible during those times. You need to also be aware of the schedule so that you can allow enough time to reach your location and set up your gear before it’s go time.
- Are there any commonly photographed animals, landmarks, or structures? Research what is usually photographed around the area you plan to visit. Find a park ranger or staff member and ask about lesser-known spots that are less traveled by tourists. Knowing what’s popular will save you time and help to avoid shooting a scene the same way it has been done time and time again. Look for ways to be creative and set your work apart!
So, you’ve researched your location and have a good idea of what to expect. Here are a few basic tips that can help you after you’ve reached your destination.
Shoot RAW


If possible, set your camera to capture images in RAW format. RAW image files are basically unprocessed, one might say uncooked, straight from your camera’s image sensor. They contain a massive amount of pixel information when compared to JPEG and take up a lot more memory card space. However, this additional information allows more latitude for adjustments in post-processing.
Use the lowest practical ISO
The ISO number of photographic film and image sensors relates to their sensitivity to light. The boiled-down explanation is, everything else being equal, the higher the ISO number the less light is required to make an image. Unfortunately, with higher light sensitivity comes increased image noise. In most (but not all) situations you will generally want to use the lowest ISO possible. That is not to say you should be afraid of bumping up the ISO. A fast shutter speed is often needed to capture the quick movements of wildlife and increased noise is far less noticeable than a blurred image.
Use AF continuous (AI Servo) mode when photographing wildlife


Autofocus (AF) can be your best friend or your worst enemy. When it comes to photographing most wildlife, however, autofocus is a great tool! Animals and birds, especially the wild variety, are almost constantly on the move. They shift positions and move closer or farther away selfishly, with little regard for the photo you are so carefully trying to compose. This is when AF-Continuous and AF-Servo modes come in handy. Though called different names depending on your camera’s make, they both accomplish the same objective which is keeping a moving subject constantly in focus. Place your selected focus area over your subject and half-press the shutter button to engage the AF. Focus will be tracked for as long as you follow your subject while maintaining pressure on the shutter button. Read your camera’s manual (you’ve done that already, right?) for detailed information concerning specific autofocus capabilities for your model, and how each mode can be selected.
Don’t forget the tripod
“I really didn’t think I would need my tripod” are words that usually begin a sad story about how a potentially great shot is missed. In most wildlife and nature photography situations a tripod is always a good idea. It’s better to have access to one and not need it than to need it and not have one available. Find the lightest and most compact tripod that is sturdy enough to handle your camera setup.
Learn so you can prepare. Prepare so you can photograph. Photograph so you can grow.
Photographing wildlife can be difficult but it can also yield huge artistic, personal, and even spiritual rewards. So go out and have fun doing what you do, but don’t forget to put the camera down every now and then to enjoy the world around you.
“Nature never goes out of style.” – Unknown


