
Side Lighting in Photography: A Comprehensive Guide

Side lighting adds atmosphere and can provide a wonderful sense of depth in your photos. But what actually is side lighting? And how can you work with side lighting for the best possible results?
In this article, we’ll take a detailed look at side lighting. I’ll show you how to use it, I’ll explain when it works, and I’ll offer plenty of tips and examples to jump-start your own side lighting photography.
Let’s dive right in!
What is side lighting in photography?

As the name suggests, side lighting illuminates your subject from one side. That’s basically all there is to it; it’s simply light that comes from the side of your subject (as opposed to behind or in front of the subject).
Of course, while this seems pretty straightforward, not all side-lit photos look the same. There’s plenty of opportunity for variation. The light can come from directly beside your subject – at a 90-degree angle from the camera lens – or it can come at a 45-degree angle in front of your subject, a 45-degree angle behind your subject, etc. The light can be hard or soft. It can be natural or artificial. It can be ambient or added. What matters is the general direction of the light.
Now, if the light comes from off to the side and strikes your subject, it will naturally create a shadow. Specifically, the side of the subject facing away from the light will be darkened relative to the side of the subject facing toward the light. Depending on the light’s characteristics, this could mean that the shaded side of your subject contains little-to-no visible detail.
For instance, when a subject is illuminated from one side by a bright, hard light source, the dark side will often fall into deep shadow. This is especially pronounced when there’s very little reflected or ambient light:

When should you use side light?
Side lighting is great when you want to emphasize texture or add a sense of depth to an image.
If you photograph a flat, textured surface with front lighting, you’ll produce an image of the flat surface without any real depth – the surface will look smooth. But if you photograph the same textured surface with a light positioned at a low angle and off to one side, the texture will become apparent. Why? Because the viewer will see the shadows created by the side light!
In a similar way, lighting a building from the front can make it appear very two-dimensional. If you wait until the sun moves off to one side, the result will have far more depth. Once again, this is largely due to the shadows created by side lighting.
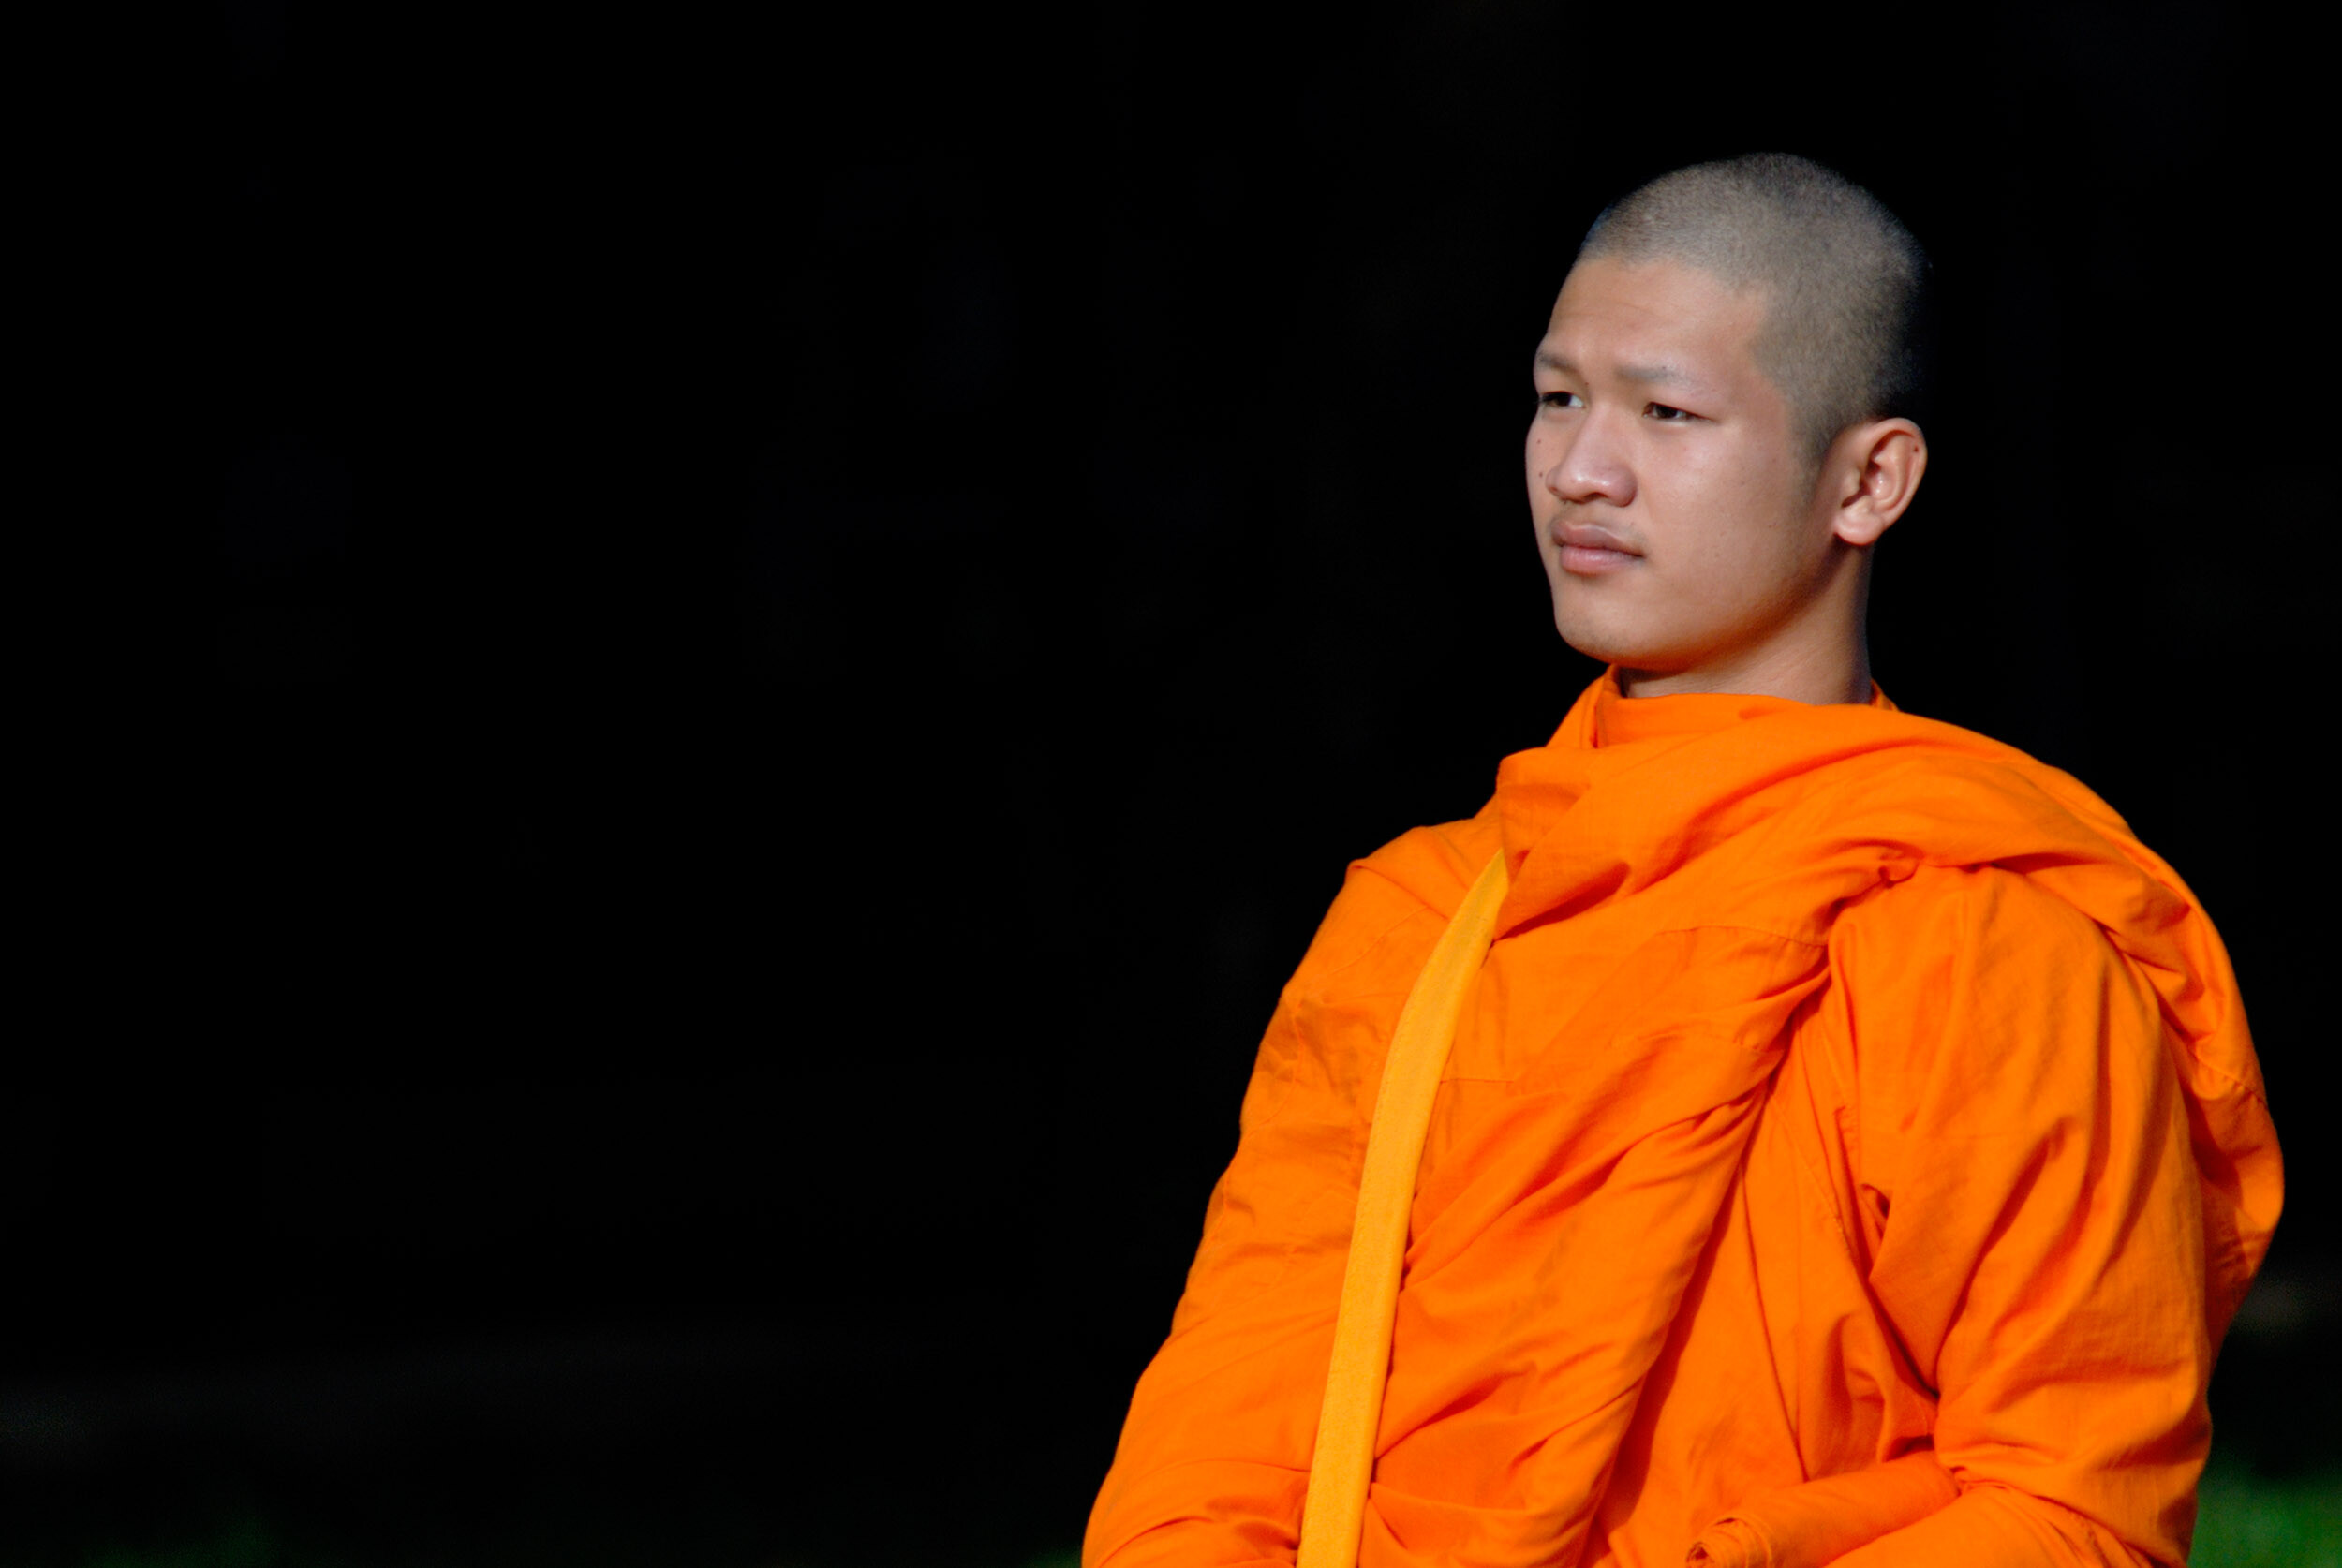
Side lighting a portrait often heightens a sense of emotion. The shadow adds drama to the subject’s face, and it highlights shapes and wrinkles far more than a flat front light ever could.
During the golden hour, the sun is low in the sky, so it offers some amazing side light. Simply position your subject so the sun illuminates it from one side; the shapes made by the shadows can then be used to add interest to your compositions.

Getting started with side light: the basics
To make the best use of side light in photography, you must be able to control the position of the light and/or your subject. (If you don’t have control over either of these elements, you’ll have to be patient and wait for the sun to move into the right spot.)
If you decide to use artificial lighting, simply grab a flash or a continuous light source, then move it off to your subject’s side. Remember that you have a wide range of options. As I emphasized above, side light does not need to be at a 90-degree angle to your lens! A 60-degree angle, a 45-degree angle, or even a 30-degree angle will all produce effective side lighting. Each position will, however, create a unique look, so you’ll need to carefully select a lighting angle based on your interests.
In other words, you can put the light source off to the side and slightly in front of your subject for a brighter, less dramatic effect, or you can put the light source off to the side and slightly behind your subject for an ultra-dramatic, shadowy look. Another option is to create a true split-light effect by positioning the light source directly to the side of your subject – so that one half of the subject is brightly lit while the other half is shrouded in shadow.
Pro tip: When you’re just getting started with side lighting, continuous lights are easier to use. They’ll let you see the exact effect created by the light before you take a photo, whereas the effect of an off-camera flash can really only be evaluated after you press the shutter button.
With continuous lighting, you can experiment constantly with different looks, and you won’t need to capture dozens of test shots. You can move the light around and watch how the shadows change, which will quickly give you a good understanding of the effects of side lighting.

Now, if you’re working with natural or ambient light, then you probably won’t be able to control the light source’s direction. But all is not lost! To achieve side light, you simply need to move your subject instead. Position your subject so that the light is hitting it from the side, then capture plenty of beautiful images!
Note: When you’re taking side-lit portraits, you may want to angle your subject so a little of the light spills past the nose. This creates the beautiful and moody Rembrandt effect; a small triangle of light will appear on the far cheek, while the rest of the face remains in shadow.
When you’re photographing something you can’t move, like a tree or a building, you’ll have to wait until the sun is in the right place in the sky. (Sometimes, you’ll need to come back at a different time of year!) Sun-tracking apps can be very helpful!

Side Light vs front light vs backlight
The beauty of side light comes from the combination, or balance, of shadows and light. But if you use front light or backlight, this combination will be very limited (or even nonexistent); direct front light, for instance, creates no obvious shadows, while direct backlight ensures that your entire subject is shrouded in shadow.
Thanks to the mix of light and shadow, side light produces more of a three-dimensional effect than either backlight or front light. The shadows provide an illusion of depth, and the result looks wonderfully real.
So if you want to faithfully reproduce a three-dimensional subject, side lighting is generally best. I’d also recommend using side lighting when working with flat subjects, especially if those subjects are highly reflective. If you position a flat subject, like a painting, so the light is directly in front of it (and behind your camera), you’ll inevitably capture an unpleasant glare effect – but if you move the light to the side, you’ll reduce the risk of glare (plus you’ll capture the subject’s texture while you’re at it!).

Backlighting leaves the front of your subject in shadow and dark in relation to the background. To capture a well-exposed subject, you’ll often need to blow out the background – which tends to look very upbeat and even airy. Alternatively, you can expose for the background and let the subject turn into a silhouette, which will produce an entirely different mood. Both of these approaches make for interesting images, but neither will produce the mysterious atmosphere that makes side lighting special.
As for front light: It tends to create photos that lack drama. The direct angle lights all parts of the subject evenly, and while the resulting images feature plenty of detail, they won’t offer much mood or atmosphere.

Advanced tips and techniques for side lighting in photography
The key to creating powerful side-lit photos is the shadows, so it’s important you manage these carefully. Ask yourself: How dark do I want my shadows to be? Do I want a high-contrast look? This will depend on the ambient lighting, but it can also be controlled by the use of reflectors and other lights.
When you want deep shadows that create lots of mystery, it’s best to use only a single light source. The more additional lights you include (or even the more ambient light you allow into the scene), the lighter the shadows will appear.
The level of contrast in your photo also helps influence the atmosphere. The darker the shadows, the more they hide details. This can help add a moodier feel to a photo. Adding a second (fill) light to soften the shadows, on the other hand, creates more of a gentle feel. Carefully controlling the fill light brightness can make or break your photos.
Also, adding a side light to a subject can help separate it from the background. With the main light off to one side, more light can fall on your subject – and if you set your exposure to produce a detailed subject, the background may turn out a little underexposed (or very underexposed). This will help separate the subject and background and add more depth to your images.

Side lighting in photography: final words
When it’s managed well, side light can produce very interesting and moody results.
As with any kind of lighting, make sure you carefully expose your subject, and make sure you spend plenty of time adjusting the strength of the main light in relation to other lights and reflectors. The intensity of the shadows will contribute to the overall mood of the pictures.
So the next time you’re setting up for a photoshoot, take some time to do side light photography. Observe where the shadows are falling. Experiment with both light and subject positioning. This will help you get the light and shadow balance just right – and you’ll produce the mood you want to create.
What do you think of side lighting? Will you use it in your photos? Share your thoughts in the comments below!


