
The Ultimate Guide To Low Light Photography: Tips, Settings, Cameras, Lenses
Low light photography is one of those types of photography that when done well can produce amazing photos but when not done well can leave you feeling a bit disappointed. It’s a type of photography that at first can seem quite complicated as if you need a PhD to master.
Yet all you actually need is a few simple pieces of knowledge and a little bit of practice.
Our cameras, just like our eyes, need light to see and to capture the scene in front of us. So, it is no surprise that when there isn’t a lot of light around our cameras can struggle, just like our eyes, to form a clear, well defined image. Luckily, our cameras also take inspiration from our eyes in their strategies for overcoming this issue, allowing more light to reach the sensor, and creating stunning images.
If you have had problems with blurry, grainy and noisy images in low light situations or if you just want to take your first steps into shooting in limited light conditions, fear not. I’m going to cover it all and get you started on the path to mastering low light photography.
Before I get into how to set up your camera for shooting in low light situations its important that you know what kinds of situations are defined as low light. Many people think that that low light photography is just another way of saying night photography and while shooting at night does fall into the low light category there are several other situations that are also classed as low light.
Low light photography is generally considered to be any kind of photography where you are shooting in light levels that are less than daytime light outside. OK, so that sounds a bit technical and while you are perfectly at your liberty to carry around a light meter with you to figure out your lighting levels it’s not strictly necessary to be that exact.
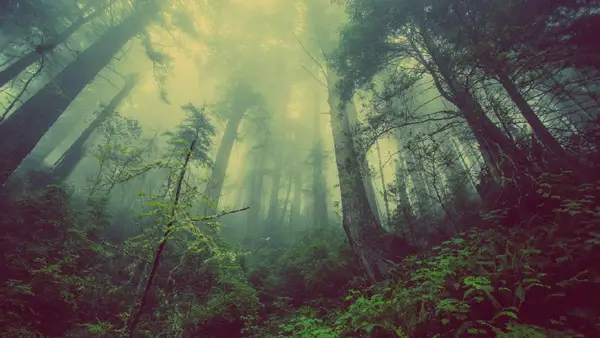
While light meters have their place its usually fairly obvious that you are shooting in conditions where you have less light than outdoors during the day. Some of the most common situations include at night, shooting indoors, before sunrise and after sunset (a.k.a. the golden and blue hours) and in shadowy areas such as behind buildings or in a thick wood or forest.
They can be grouped into three low light categories:
- Visibly low light. These are situations where you are outside in daylight but are in shadowy areas such as behind buildings, under bridges or even in woods and forests.
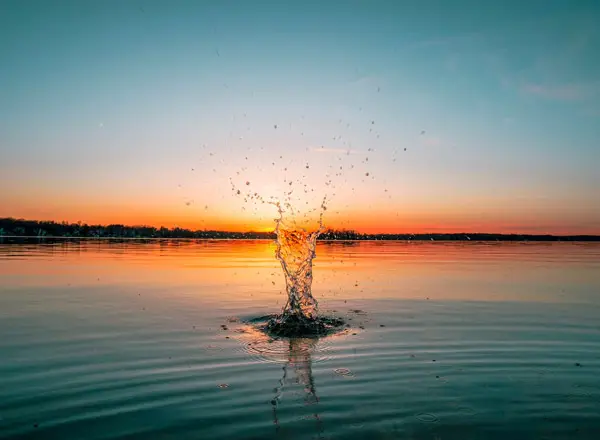
- Low light. These are situations when you can clearly see everything around you, but you can tell it’s getting dark. Think before sunrise, after sunset or indoors.
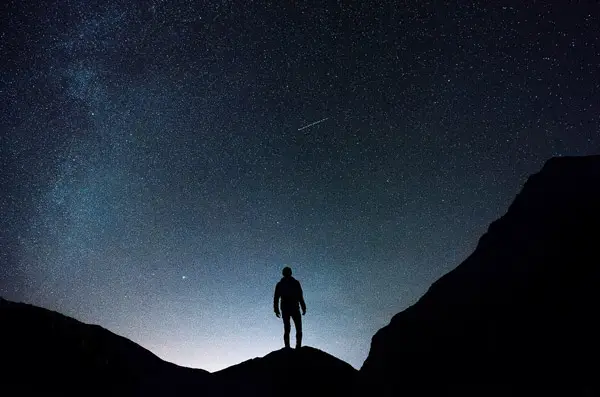
- These are situations when it is night-time and so only the brightest objects can be seen or the subject is lit artificially by streetlights, the moon, or a fire.
Each group comes with its own challenges and while the techniques and strategies you can use to overcome them are similar, knowing which kind of situation you are photographing in will increase your chances of producing a great image.
When there’s not a lot of light it can be tempting to switch the flash on to help you out. However, the flash can often light the subjects quite harshly and can leave the image looking flat and/or washed out. You may feel like you’re stuck between a rock and hard place but there are several ways that you can still capture a great image in low light without using your flash.
I will go into more detail in later sections about camera settings but there are a few other more creative techniques you can use too.
Take Advantage of The Light You Do Have
Yes, you don’t have the best lighting conditions but that just means you get to be extra creative with the light that you do have. Whether it is using streetlights or signs or even a fire to cast cool shadows across your subject or to highlight a particular person or thing, get your creative juices flowing and mix up your shots.
Shoot in Black and White
Sometimes when you haven’t got a lot of light the colour can become a distraction. It can pop in an area of an image you don’t really want it to or perhaps you’re just having issues with getting the colour to stand out at all.
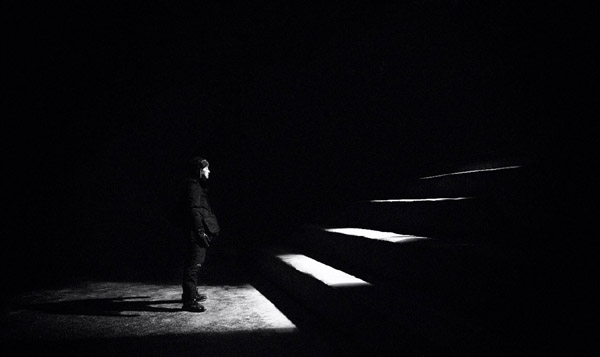
Enter the black and white photo. With no colours to worry about the focus of your shot can change and allow you to direct the eye to a different part of the image. It also allows you get even more creative with shadows and create some cool moody or even sinister tones to your images too.
Get Stable
One of the most common problems people have when shooting in low light is blurry images. This usually occurs because of the need for shooting at slower shutter speeds to allow more light to reach the sensor (or film). Blurry photos occur either because of camera shake or because the subject in the image is moving.
You can easily reduce this by getting stable. While really helpful when you don’t have great light, stabilising yourself and your camera is actually something you should be doing every time you take a photo. Luckily, it doesn’t take long until this practice becomes second nature.
Stabilising yourself and your camera can be as simple as switching on the image stabilisation option on your camera and/or lens, holding the camera with both hands instead of one. Holding the camera closer to your face and tucking your elbows in are also great ways to stabilise. Alternatively, leaning on a table, a post or even the floor can work well. However, when it comes to shooting at night you’re probably going to want to opt for a tripod.
While this may seem a little restricting at first it actually can help you to control motion blur and create cool shots such as a dreamy ocean scene or allow you to play with light painting.
As I mentioned earlier one way to overcome the challenges of low light is to change your camera settings. Which settings you change will depend on which situation you’re are in although it is advantageous to shoot in manual mode in any low light situation. This is because it gives you full control over what the camera is doing and can set it to capture the exact shot that you want.
Increasing You ISO
Increasing your ISO or the amount of light that is allowed to reach the sensor is most likely the go to first option as the light fades. If you’re shooting in a shady spot or a particularly cloudy day increasing the ISO slightly may do the trick. However, the lower the light level the more problematic this strategy becomes.
While a lot of DSLR cameras will allow you to shoot with ISOs as high as 6400 (and higher) it is generally ill-advised. This is because for most cameras once your ISO settings get higher than 800 your images pick up more noise and become grainy.
Therefore, it is suggested that the closer to 100 you can keep your ISO the less grainy your images will be. It is important to note that each camera is different, and it is worth testing out your cameras ISO threshold.
You can easily do this by taking a series of photos of the exact same thing using the exact same settings but increasing the ISO each time. You can then compare the images to see at which ISO they become grainy. The ISO setting before this is your threshold. For example if your image becomes grainy at ISO 3200, then you would only use up to ISO 1600.
Optimise Your Shutter Speed
While keeping the shutter open for a longer time to let more light reach the cameras sensor may seem like the logical solution to shooting in low light, it may not always be the best option. This is because the longer the shutter is open, the higher the chance of a blurry image due to camera shake or motion blur. Now, unless you are specifically trying to capture blur this will probably be somewhat frustrating.
This is why in some cases opting for a slightly higher shutter speed would be a preferred option. For example, when shooting in shady areas such as behind buildings or in a forest you may be able to account for the lesser amount of light simply by increasing the ISO slightly. As you don’t need to exceed the ISO grainy threshold that I talked about earlier, there is no need to compensate with a slower shutter speed.
On the other hand, if you are shooting at night or around dusk or dawn, just increasing your ISO will likely not be enough and you will probably have to compensate by decreasing the shutter speed. It is generally accepted that shutter speeds of 1/60th and quicker are fine for using without a tripod or monopod. In some cases, it can be even slower if your camera and lenses have image stabilisation technology.
However, if you have the choice between capturing an image that is blurry because your shutter speed is too slow or capturing an image that is grainy and noisy because your ISO is too high, I recommend the latter. This is because it is easier to correct for image noise than image blur in post-production. So even if you do end up with a slightly noisy image it’s probably not the end of the world.
Open Up the Aperture
If you’re still struggling with capturing that perfect low light photo then playing around with your aperture settings is probably going to help. By opening up your lens aperture you are going to let more light pass through the lens into the camera body and sensor. This is like when the pupils of your eyes widen when you are in a dark room.
To figure out the best aperture for the situation you are shooting in it’s best to start by opening up your lens aperture to its maximum, or lowest f-number and take a series of replica shots with increasing f-numbers. Obviously, if you are shooting in a shady area or indoors you will probably be able to use a higher f-number. Whereas if you are shooting at night using that maximum aperture is most likely going to be your best bet.
For example, if you have 50mm f/1.8 prime lens your maximum aperture will be f/1.8. However, if you have a zoom lens such as a 70-300mm f/4-5.6 lens then your maximum aperture would range from f/4-5.6 depending on which focal length you are using.
It is important to note that opening up your aperture to its maximum will also affect the images depth of field and may put your subject out of focus.
Manual Mode Vs Priority Mode
When taking photos in low light conditions the best way to ensure that you are going to capture the image exactly the way that you want to is to put the camera into manual mode. That way you have control over all the settings.
However, there are arguments for using one of the priority modes. If you are shooting in a visibility low light situation, i.e. under a bridge, in a forest or behind a building then opting for a priority mode may be a good fit. For example you may be trying to capture an image of wildlife in a wood or forest and so the using the shutter priority mode would help you ensure no blur while not missing out on a shot because you are fiddling around with your settings.
On the other hand, because there is so little light available when taking photos at night it is vital that you are in control of all the settings and so not shooting in manual mode may leave you feeling a little disappointed or even frustrated.
Just like some lenses are better for landscape photography and some are better for capturing fast action such as sport, some lenses are better for taking photos in low light situations. When choosing a lens for shooting in low light there are few things you should consider first.
Use A Fast Lens
When you ask someone what kind of lens they should use for taking photos in low light situations, the first response will most likely be a fast lens, but what exactly is a fast lens? The phrase fast lens is to do with the lens having a low maximum f-number which means that the camera body can use a faster shutter speed.
As I mentioned earlier the aperture, known as the f-number or f-stop, is a physical property of the lens. Different lenses have different maximum apertures which means that choosing which lens you are using is an important part of capturing an image in low light conditions.
Consumer zoom lenses tend to have a maximum aperture between f/3.5 and f/5.6 whereas a professional zoom lens often has a constant maximum aperture of around f/2.8. Prime lenses often have an even lower maximum aperture that can reach as low as f/1.4 and some specialty lenses can even go as low as f/0.95.
By using a lens with a really low maximum f-number it allows you to use a faster shutter speed and thereby prevent motion blur or camera shake. Obviously, you still need to consider the depth of field and balance having your subject in focus and any blurring.
Image Stabilisation
Image stabilisation (can also be called vibration reduction, vibration compensation and optical image stabilisation) is a cool little feature that you can find on lenses that can have such a profound effect. The technology basically allows you to shoot handheld at slower shutter speeds without incurring camera shake.
It can also be found on some camera bodies as well so if your lens isn’t equipped with image stabilisation you are still able to compensate with the stabilisation features in the camera. Luckily, manufacturers are becoming more aware that this is a feature that photographers want and so have been adding more options to both lenses and cameras.
Best Lenses for Low Light Photography
Canon EF 50mm f/1.8 STM
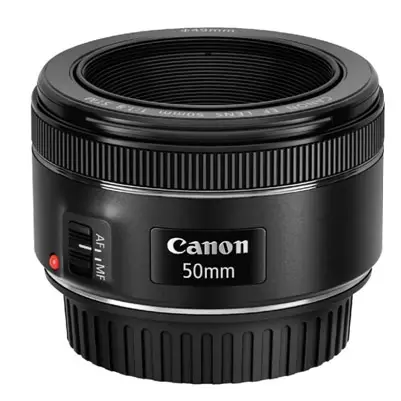
The wide f/1.8 aperture makes this lens great for low light photography and allows the subject to really stand out thanks to the shallow depth of field. A really versatile lens you can use it for portraiture, sports, street, and low light photography meaning that it’s a great lens to have in your kit. Another bonus is the STM stepper motor for autofocus is really quiet and quick meaning you hardly notice it.
Click here for current pricing and more information.
Sigma 18-35mm f/1.8 DC HSM Art
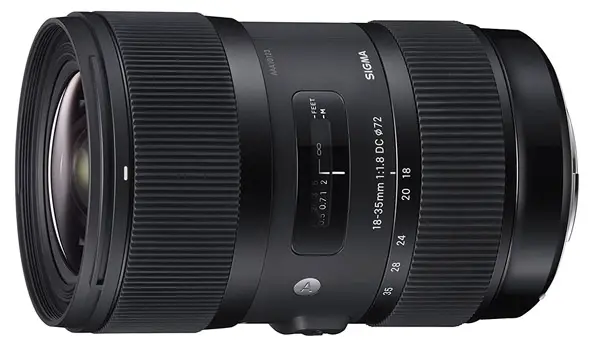
Despite being a zoom lens, this lens still has a fantastically low and constant maximum f-number of f/1.8. this makes it great for shooting in low light situations especially when you may need to move around such as during an event. Constructed from a thermally stable composite material making the lens more durable and coated with a Super Multi-Layer coating to reduce reflections and lens flare make this lens a great choice for any kind of photography.
Click here for current pricing and more information.
Nikon AF-S FX NIKKOR 24-70mm f/2.8E

Again, this zoom lens comes with a low and constant maximum f-number of f/2.8. While not as low as the Sigma lens it will still perform very well in low light conditions with the advantage of having great focal length versatility. It comes complete with four stops vibration reductions, image stabilisation and aspherical extra low dispersion elements which help to reduce flare, ghosting and aberrations.
Click here for current pricing and more information.
Just like lenses, your actual camera body will make it easier or harder to capture amazing photos in low light situations. Besides having image stabilisation settings as I discussed above the other major consideration is your image sensor size.
One of the biggest indicators to whether a camera will perform well in low light is its sensor size. While some APS-C cameras are starting to perform better, if you plan to do a lot of low light photography then getting a full frame camera would be advisable. This in conjunction with a fast lens will have you transforming you low light photography skills.
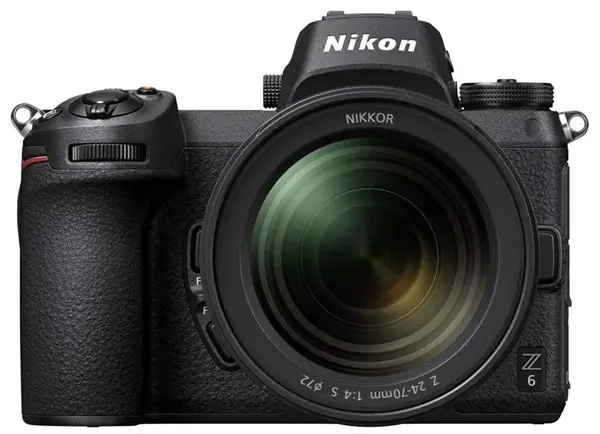
The Nikon Z6 has a lower pixel count on the same sized sensor as the Nikon Z7 which gives it an advantage in low light. The larger pixels are able to gather more light and so the noise levels are reduced. It also comes with 5-axis stabilisation with 5EV stops of compensation allowing you to use higher shutter speeds.
Click here for current pricing and more information.
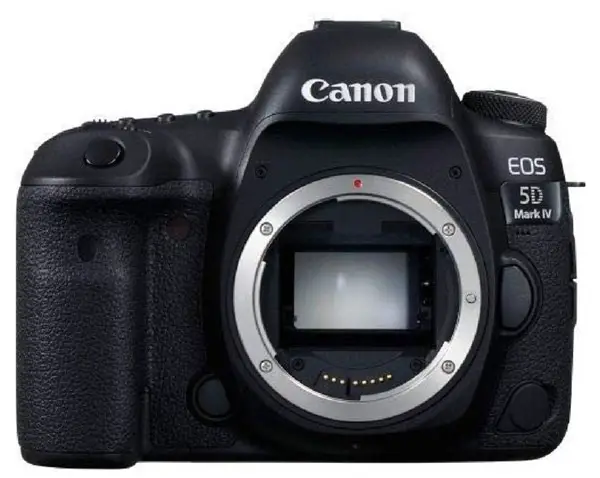
With a full frame sensor, plus Dual Pixel autofocus and full weatherproofing this camera not only shoots well in low light but is great for any other kind of photography you do. A favourite for many professionals the Mark IV has a great dynamic range and amazing ISO performance which are integral to shooting quality photos in low light conditions.
Click here for current pricing and more information.

This full frame camera comes with in built image stabilisation and an ISO range from 50 up to 409600. Designed to optimise dynamic range while minimising noise this camera is highly regarded when it comes to low light photography.
Click here for current pricing and more information.
Even if you are using a full frame camera and fast lens, you have the right settings and you have yourself and/or you camera stabilised well you could still find yourself not being able to create the image you want to. Luckily, there are a few more tips and tricks than can help you out when shooting in low light conditions.
These are Peter McKinnon’s top tips and tricks.
Turn Off Autofocus
I love autofocus. It makes life so much easier, most of the time. However, as the light starts to fade, or you find yourself shooting at night you may find that your camera is struggling to focus. Turning it off and manually focusing may take you a little longer to capture the image but it gives you the control to focus the image how you want it.
Position Your Subject Closer to the Light Source
As the photographer, you are in control. If that means repositioning your subject so that there is more available light for your camera then do so. If it means, opening curtains, having your subject stand on a table, or even getting them to hold a light source then so be it. If it means that you can create the image you and/or they are after, then go for it. After all photography is a creative medium so don’t forget to play around and have some fun!
Shoot In RAW
While shooting in JPEG can save you memory, shooting in RAW gives you greater options in post-production editing. When working in low light conditions its easy to over and under expose parts of your image and by shooting in RAW you give yourself that extra flexibility to alter the highlights and shadows without complications such as noise being a big issue.
Try HDR
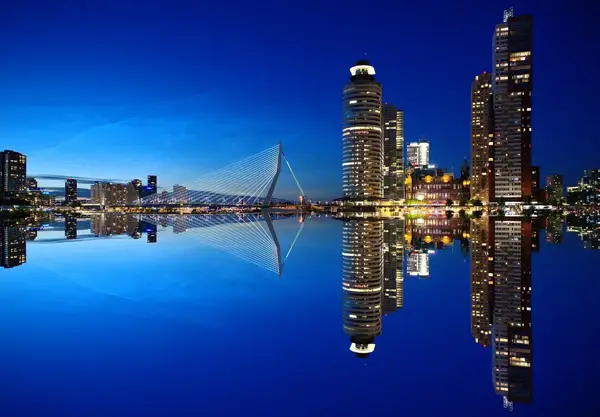
Sometimes you can be taking photos in a generally low light area but have some bright spots for example when capturing a cityscape image at night. The shot is generally quite dark but there are usually lots of bright lights from buildings and vehicles.
To overcome this, you can create high dynamic range (HDR) images using a process called bracketing. This is basically where you take a series of photos (usually 3-5) where one photo is exposed correctly and then either 1 or 2 (depending on whether you are taking 3 or 5 images) are underexposed and 1 or 2 are over exposed. You would them stitch them together in your image editing software.
Use A Flashlight for Light Painting
If your subject is really dark you can use a flashlight or a fire etc to light it up and highlight it. You can also get really creative and using long exposures you can create cool light patterns in the image. Whether you want to create star streaks across the sky, write your name in lights or just add some a little different to your image painting with light using a flashlight, sparkler or LED lighting can be really fun.
I hope this article has got you well on your way to creating amazing low light photos and your mind is racing with new ideas. Go out there and have fun!
Click the link to learn more about photographing the night sky.


