Video – Affinity Photo Tutorial – Time For Reflection
This is video above is a supplement to the article in issue 180 of Professional Photo.
IT TAKES SOMETHING special to differentiate your portraiture from your competitors’ these days and working professionals know only too well the unforeseen restrictions you could encounter on a photo shoot that result in you coming away with an image that you’re not entirely satisfied with.
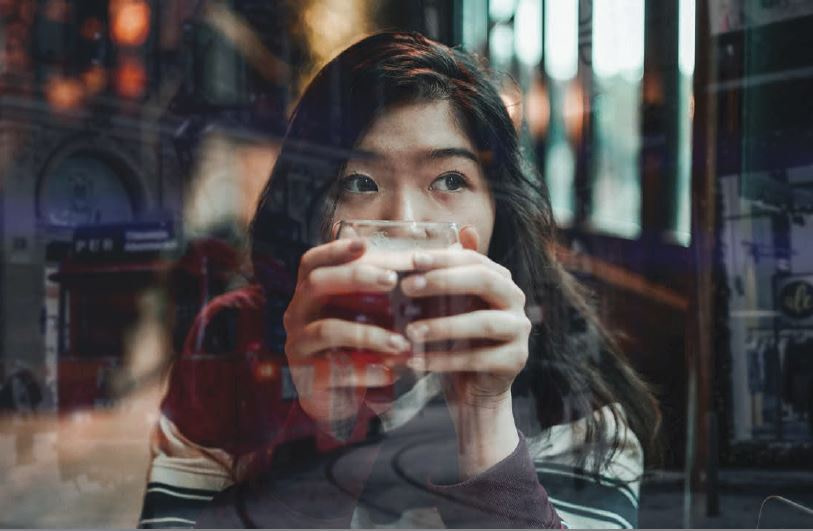
However, creativity doesn’t have to stop once the shutter has been pressed, and there are some clever editing tricks out there that can allow creatives the opportunity to reinvent their work and to add another layer of interest. By working with the Layers and Blending modes found within Affinity Photo, you can, for example, introduce another image into your scene to create a highly realistic reflection, simulating the look of a window being placed between the camera and your subject. All you need is your original portrait and an additional image that you think could work well as the reflection scene, and it’s a brilliant way of bringing two separate concepts together in a believable way. This smart technique can also be used to digitally place a person at a particular location.
What’s more, although the steps may look a little complicated, they are actually really straightforward and can be completed in under five minutes – not a bad use of time to breathe new life into a portrait and help it to stand out from the crowd.
Try Affinity Photo v1.7 out for yourself with a free trial, available from the Serif website at: https://affinity.serif.com/en-gb/photo/

© 2021, Professional Photo Magazine and Respective content owners.. All rights reserved.


