Water Splash Photography Made Easy

Are you looking to capture stunning water splash photography?
You’ve come to the right place.
I’m an experienced water splash photographer – and in this article, I’m going to reveal my tips and tricks for gorgeous, one-of-a-kind water splash shots.
(It’s actually pretty easy. Fun, too!)
So if you’re ready to get some jaw-dropping shots…
…then let’s dive right in!

What equipment do you need for water splash photography?
Water splash photography setups are pretty minimal.
Here’s what you should have on hand:
- A glass aquarium with a minimum size of 24” x 12” x 16”
- A table covered in black cloth
- A black background (paper or textile), positioned at least six feet away from the aquarium.
If possible, you should also find an assistant – a friend, family member, etc. This will make your life much easier.
While you can do everything by yourself, it’s hugely helpful to have someone who can throw the objects into the water, get them out, then throw them again and again and again (while you snap away with the camera).

Gear and subjects
You don’t need much specialized gear for water splash photography.
Any decent camera will be okay, though to obtain better quality, you should use a DSLR or a mirrorless camera with a good lens.
(I shot from a distance with a 70-200mm f/2.8 lens at 200mm.)
And always use a tripod; this will make focusing and framing ten times easier.
Last, you will need two flashes, one on each side of the aquarium, aimed directly at your subject (as shown in the photo below). I prefer to use light modifiers; these restrict the light so it only hits the subject and doesn’t spill all over the scene, so you can avoid unwanted reflections and highlights.

As for your splash subjects:
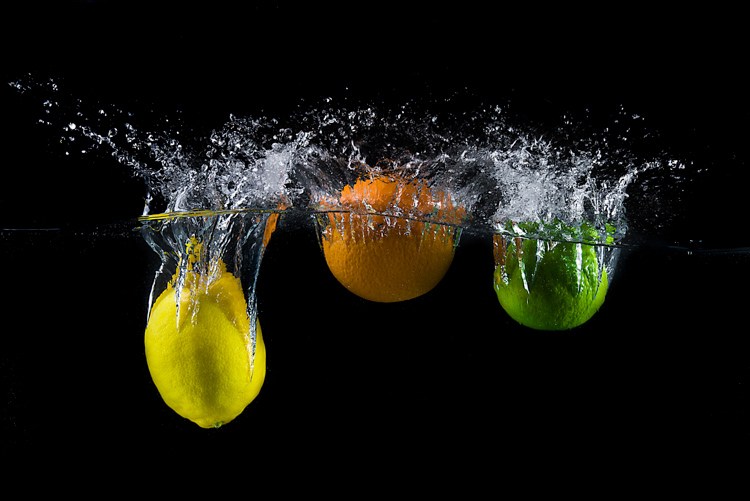
Use anything you like! I personally prefer fruits and vegetables because they vary in size, shape, and color. But you could also photograph golf balls, coke cans, old tools, and more!

Setting up your water splash studio
Fill the aquarium with tap water. You’ll want to make it halfway or two-thirds full, depending on how far you want the subjects to fall.
If you fill the tank too high, every splash will result in water spilling. So please be careful with both flashes and your camera when working with water!
Set your camera at a position where you have the desired framing of the aquarium, leaving enough space up, down, and on both sides to capture most of the splashes.
After you have positioned the camera, you’ll need to set the focus manually, as I discuss in the next section:
Focus manually on your subject
For this step, ask your assistant to hold your subject in the water where you want to make the splashes happen.
Focus your lens.
Then leave the camera on manual focus (or use back-button focus). That way, the camera won’t need to refocus every time you take a picture, and you’ll know that your subject will be in focus every time the object drops in the expected location.
Freezing the water splash
Freezing the motion of your subject will be done by your flash, and not by your camera.
Why?
Because your camera must be in sync with your flashes. In most cases, this forces your shutter speed down to around 1/125s to 1/200s – which is way too slow to freeze fast action. (Note: this maximum speed is referred to as your camera’s flash sync speed.)
Luckily, there is a magic word: flash duration.
It’s the short period of time when the flash emits light (which is far faster than your camera’s sync speed). And if short enough, it’ll give you the freezing effect you’re after.

You can use speedlights for water splash photography, as they generally have a pretty short flash duration – but only at very reduced power settings of 1/32 or 1/64. Such settings will result in darker shots, but you can compensate by increasing the ISO and opening the aperture.
Personally, I prefer to use strobes with short flash durations. Most manufacturers make the flash duration of their strobes – as well as the power you get at the shortest flash durations – public information.
For the pictures in this article, I used Elinchrom ELC Pro HD 500 strobes, which have the shortest flash duration – 1/4000s – at power 3.1.
For this shoot, my camera settings were ISO 100, f/16, and 1/125s.

Taking the water splash photos
This is the fun part! If you have an assistant, you’ll need to synchronize your movements.
Here’s the step-by-step process:
Step 1: Count to three.
Step 2: Have your assistant drop the object.
Step 3: Fire your shutter release to capture a stunning splash.
I sincerely suggest you repeat these steps for a few hours. I prefer to set my camera to continuous or burst mode (my flashes recycle very fast) and record three or four pictures per drop. That way, I increase the probability of capturing the subject and the splash of the water.

Some quick splash photography tips:
- Use subjects with vivid color; that way you will have good separation of the subject from the black background and the white/bluish splash. This makes your pictures really pop.
- If you photograph small subjects, try to use a minimum of six to ten pieces at once.
- Try to combine subjects of different sizes, colors, and shapes.
- To get larger splashes, use subjects with a larger surface area, or let them fall from a higher position.
- Wash the fruits and vegetables before you use them. That way, you can keep the water clean for a longer period of time.
- If the water starts becoming dirty, change it. This can be pretty unpleasant because the tank will be heavy. But the good news is that, by regularly changing the water, you’ll have to work less in the post-processing phase – and you’ll get sharper, cleaner images.
- Frequently clean the front glass of the tank to get rid of the water drops that tend to accumulate on it.

Post-processing tips
This part is crucial! No matter how hard you try to capture the perfect splash, your RAW images will still need a bit of polishing and processing.

I only use Lightroom and Photoshop for post-processing, but you can achieve the desired effects in pretty much any editing program.
Clean up the water
After you’ve opened your water splash photo, you’ll first need to clean the water.
I suggest that you use the Adjustment Brush with the Blacks slider set to -100.

Apply this brush everywhere except the subjects (it would make the subjects too dark).
You can use the brush even on the splash itself because this will make it cleaner and sharper. But be careful not to overdo it, or you’ll lose some details on the splash.

Final touches
Now open the image in Photoshop, create a new empty layer, select the Brush, then start painting the new layer black.
This will give you a clean black background, but be careful when painting near the subjects (you don’t want to paint over them!). You can even paint away small drops of water that you consider unnecessary. Try to preserve a little bit of the surface of the water, though.
Once you’ve finished painting, you should sharpen the image. You can also add some contrast or saturation depending on the look you’re after.


Water splash photography: conclusion
Are you ready to give water splash photography a try?
Now you know the setup, the techniques, and the post-processing.
So take some shots! Have fun!
You’ll love the results.
Do you have any questions about water splash photography? Ask them in the comments below! And if you have any water splash photos you’re proud of, make sure to post those, too.


