
Step-by-step Guide to Long Exposure Photography
In the past few years, thanks to the diffusion of useful accessories and photographic filters with good quality and low prices, the technique of long exposure has become increasingly popular among photography enthusiasts. Even if this technique can be used both in the studio and in an urban environment, the perfect playground for long exposures is landscape photography.
Unfortunately, it often happens that the result we get is far from our expectations, and we end up classifying the long exposure as an impossible technique. However, following this step-by-step guide to long exposure photography, you’ll see how easy it is to get a good result on the first attempt (or almost!).


Step One: Study the weather
A day with a cloudless sky is a good day to drink a beer with friends, not to make long exposures. Likewise, it cannot rain forever, so do not resign yourself to an afternoon with your PlayStation. You should study satellite images rather than the meteorological sites, trying to figure out if there is an incoming storm, or if the downpour is about to end.
Step Two: Visit the location well in advance
Scout the location ahead of time, as you need a lot of time to find the perfect composition, or at least more than the time needed for a “short exposure”. In fact, in a long exposure, the world is completely different from how you see it with your own eyes. You have to try to see it with your mind, looking for a harmonious composition that includes moving subjects, trying to predict the direction of the clouds or the force of the sea.
Try not to put the sun into the composition, because its movement will ruin the shot and it will create an area of overexposure that is not recoverable. If you cannot avoid the sun, wait for it to hide behind a cloud.


Step Three: Use a tripod
Mount your camera on a tripod and install all the accessories such as the remote shutter release and the filter holder (if you are using drop-in filters). However, wait to actually install the filters. This is very important!
Step Four: Compose the image and lock focus
Refine your composition, focus on the subject, and lock the focus. If you are using manual focus, go ahead and turn the lens’s focus ring.
If you are using your camera’s autofocus mode, you should focus by half-pressing the shutter button, and once the focus has been made, while still holding down the shutter button halfway, push the lever from Auto Focus to Manual. In this way, your camera will maintain the focus (alternately, you could use back-button focus).


Step Five: Set the exposure
Now set your camera to Manual (M) mode or Aperture Priority (A/Av) mode. Then set the aperture to an appropriate value for the scene (for landscapes I suggest between f/8 and f/11) and take a “test shot.”
The test is complete when you get a correct exposure. To determine if the exposure is correct, check the histogram (do not trust your display, it is too bright). It is true that there is no universally correct result on the histogram, but there are histograms that are universally incorrect, namely moved completely to the right or left side (the image is respectively overexposed or underexposed).
Once the test shot is successful, write down the shutter speed you used for that shot.
Step Six: Add your filter
Now add your Neutral Density (ND) filter. If the filter is very strong (10 stops, for example), you will not be able to see through the viewfinder or the Live View. Do not worry, because if you have followed the guide up to this point you will notice that we have already made the composition and the focus too. You are blind, but your camera will see everything perfectly.


Step Seven: Change to Bulb mode
Set the shooting mode to Bulb (B) in order to discard the thirty-second limit of the camera. Do not change any of the other settings (ISO and aperture) used in the test shot.
Step Eight: Take your long exposure shot
It is finally time to take our long exposure shot.
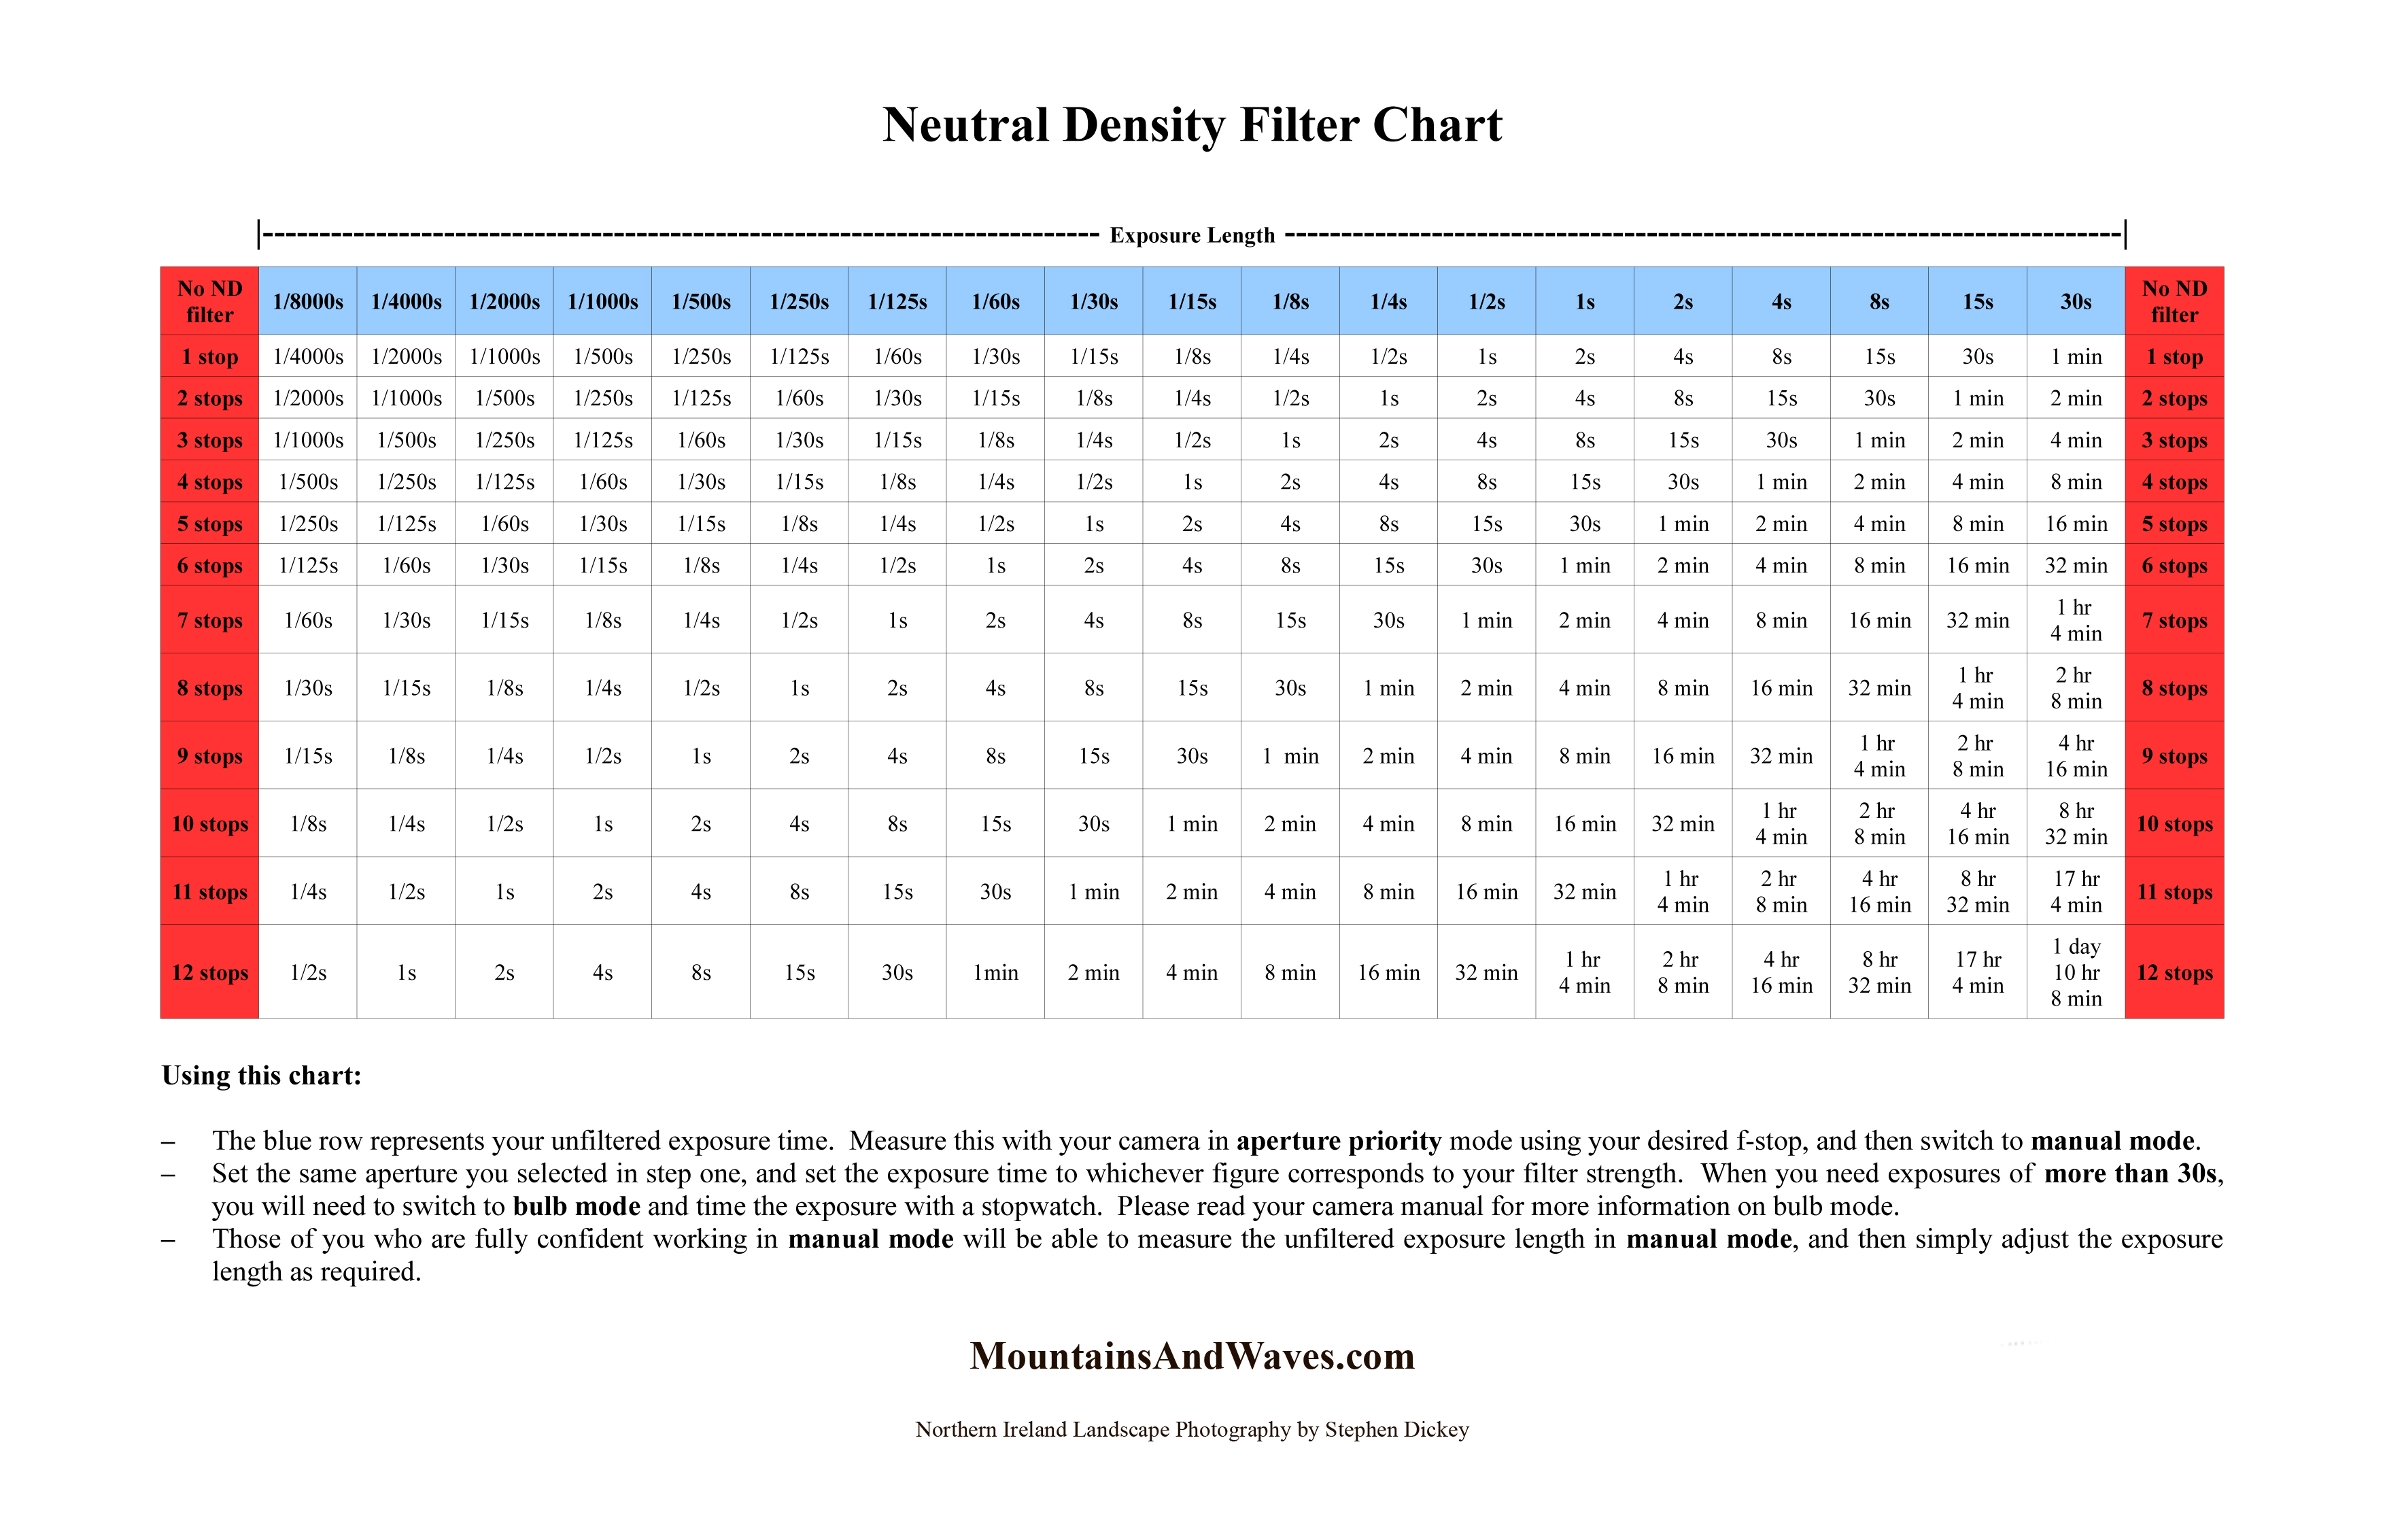
But how long will you need to leave the shutter open? It is less difficult than you might expect. First of all, recollect the shutter speed that you noted down from the “test shot” you did in Step Five above. Now you must compensate by the number of stops introduced by the filter.
For example, if your test shot was 1/15th of a second, adding 10 stops will get a shutter speed of approximately 60 seconds. Now you have your shutter speed!
(No need to get stuck in the mathematics: On the internet you can easily find conversion tables and applications for your smartphone that will do the conversion for you.)


Step Nine: Check the histogram again
Once you’ve taken the shot with the calculated shutter speed, check the histogram. If the new histogram is approximately equal to the histogram of the test shot, mission accomplished. If it is shifted too far to the right or to the left, repeat the shot again correcting the shutter speed.
Easy, isn’t it? Now fill your backpack with your camera and filters and go to practice in the field!


